
Blogger is a free publishing platform offered by Google used for blog creation.
Generally, blogs are hosted by Google as a subdomain of blogspot.com – for example, www.infopointhaii.blogspot.com. However, users can also host them on a custom registered domain, like infopointhaii.com.
In this passage, we will try to make you understand by going through the process of pointing a custom domain name to Blogger.
Before we begin, make sure you have the following essential requirements:
Here are a few reasons why you should opt for a custom domain name for your Blogger website:
- Brandable and Easy to Remember. A Blogger custom domain is much easier to remember than a lengthy subdomain. A shorter and simpler domain name is also preferable when it comes to advertising and promoting your blog.
- Looks Professional. Custom URL domains can help to convey professionalism. Users are more likely to visit the blog URL infopointhaii.com instead of infopointhaii.blogspot.com.
- Multiple Uses. Owning a custom domain name allows you to create your own business email account. Another benefit is that if you ever decide to make an online shop, you can purchase hosting and publish your store there while keeping the blog page intact.
How to Set Up a Custom Domain for Blogger
This section will cover the steps on how to set up a custom domain for Blogger.
Step 1. Purchase a Domain Name
Before you can connect your custom domain name to your Blogger site, you need to purchase one from a domain registrar. You can use multiple options who offers domain name and web hosting and one such trusted platform is Hostinger’s domain name checker to see what domains are available and make a purchase there.
Step 2. Adding Two CNAME Records
Then, it’s time to set up the CNAME records, which you can do by following these steps:
1. To find the required CNAME records, navigate to your blog’s Settings → Custom domain section.

2. On the settings page, enter your domain name and click on Save.

Note that the domain name must be entered with the www subdomain.
3. After that, a screen with the two required CNAME records will appear.

4. Add these records using any DNS editor. You can contact your hosting provider or domain registrar for assistance. In this example, we will use hPanel’s DNS Zone Editor. First, edit the existing CNAME www record.
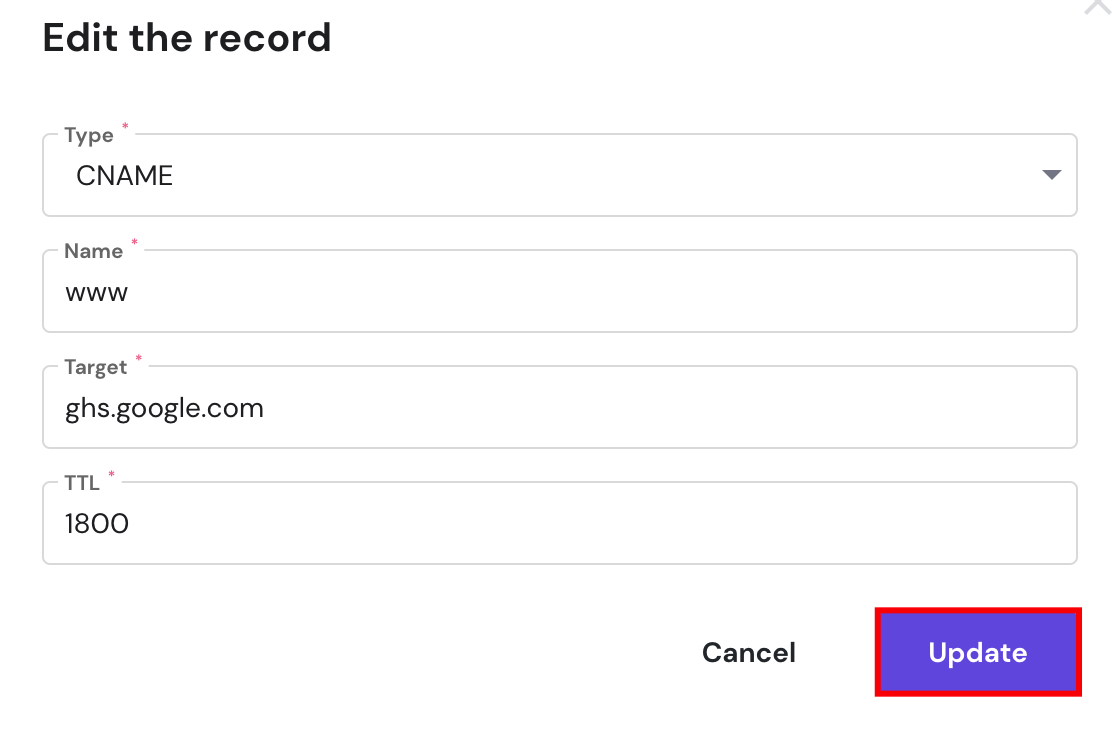
5. After that, add the new CNAME record.

6. After adding both CNAME records, save the changes on your Blogger account and allow up to 24 hours for the DNS settings to fully propagate.
Step 3 (Optional). Adding Four A Records or Redirecting to WWW
An optional step would be to add four A records. This way, you will link both www and non-www address versions of your website, loading it from both URLs.
If you skip this step, visitors who leave out the “www” part of the domain will see an error page or a different site, depending on your current A record.
To avoid that, create A records for these IP addresses:
- 216.239.32.21
- 216.239.34.21
- 216.239.36.21
- 216.239.38.21
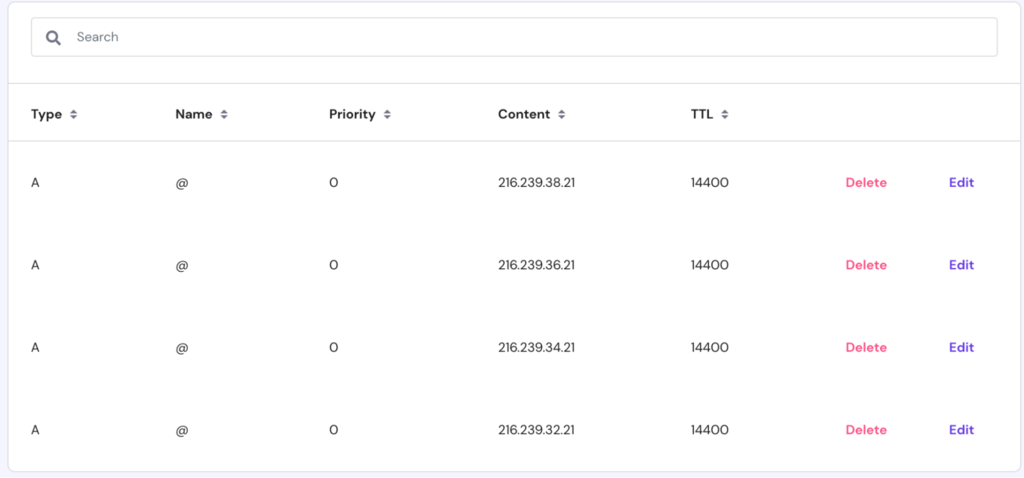
After adding the A records, it may take up to 24 hours to fully propagate. Then, both the www.domainname.com and domainname.com URLs will lead users to your blog.
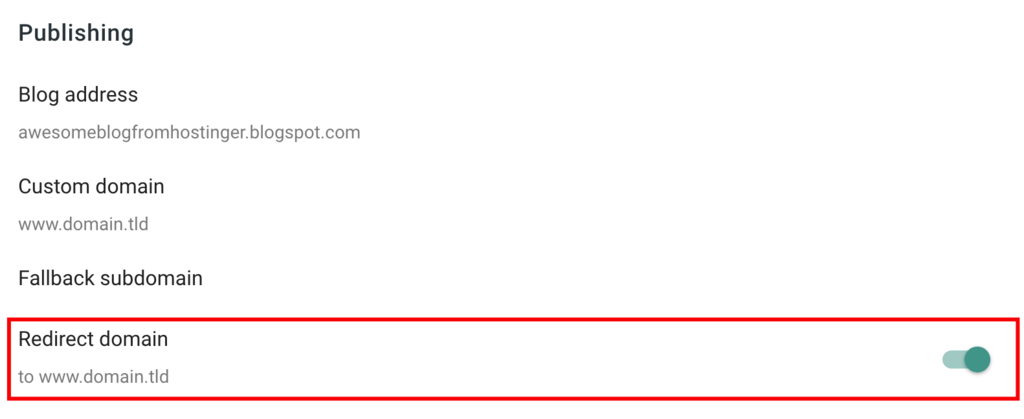
Alternatively, it’s possible to redirect visitors from the non-www to the www version of your blog. That way, setting the A records will not be required.
You can create redirects after configuring your custom domain settings. Open the Settings section and activate the toggle on Redirect domain.
Conclusion
Blogger is a free blog hosting service that includes a free subdomain. However, since the Google-provided URL is lengthy and can be hard to remember, it’s a great idea to use your own new domain.
In this passage, we have tried to explain the benefits of using a custom domain for Blogger. We have also examined the process of correctly pointing your domain via CNAME records and A records.
We hope that you found this information useful. In case you have any questions, leave them in the comments section below.
Thanks for being with us